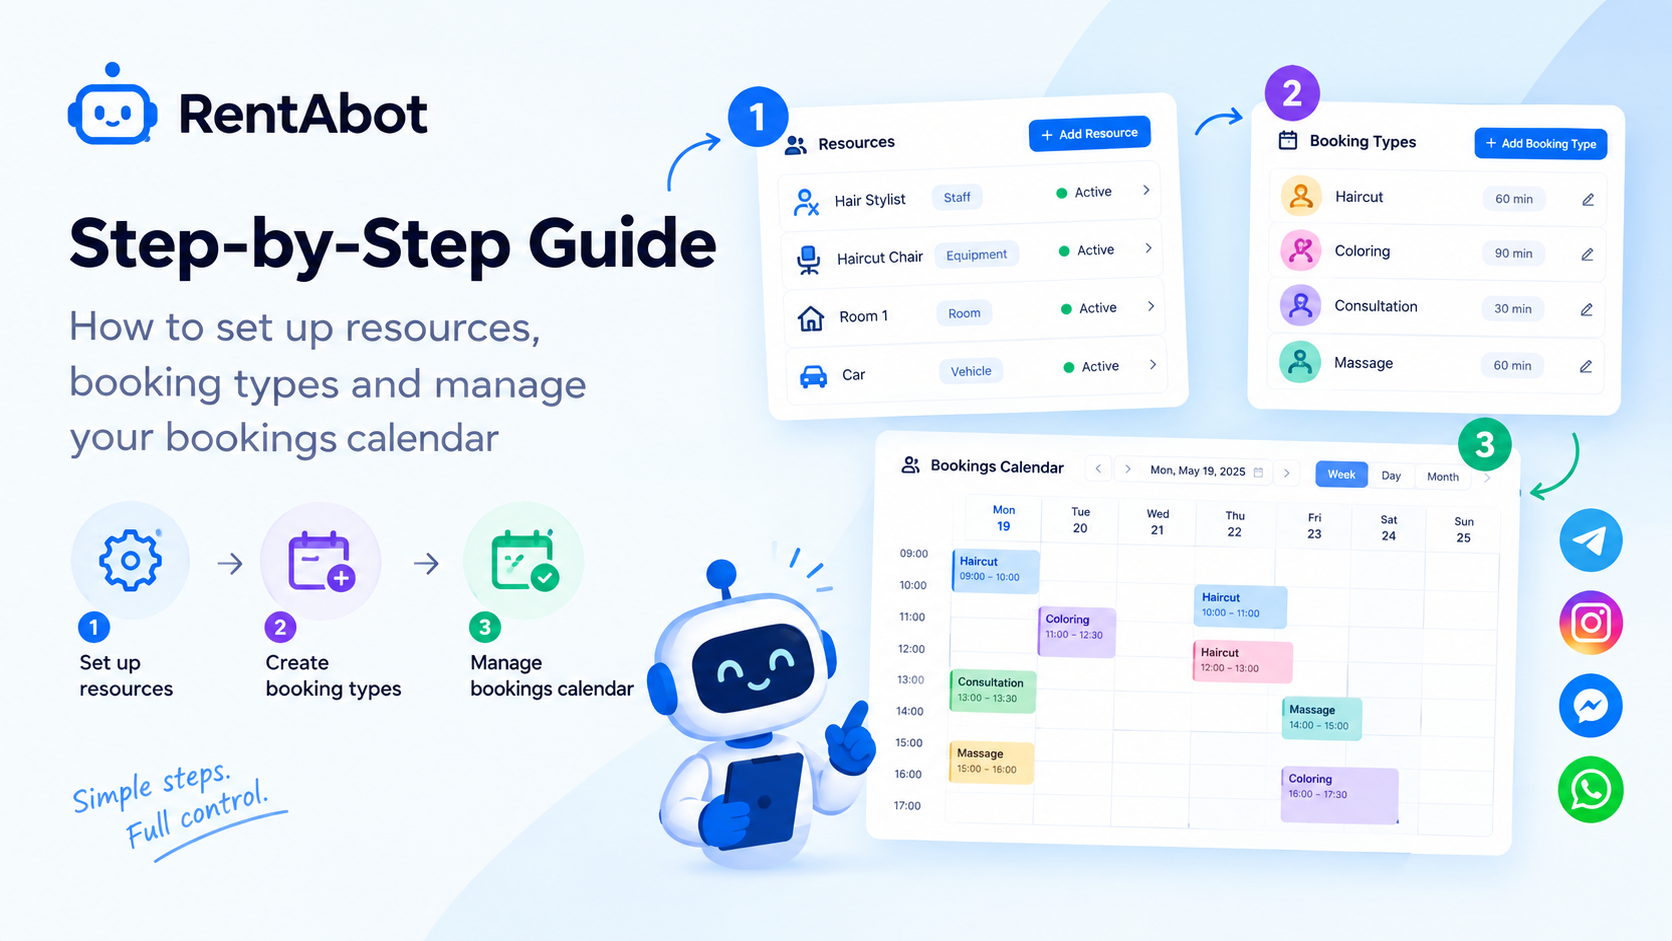
Before clients can book you, RentABot needs to know three things: who or what does the work, what you offer, and when you're free. Once those are in, everything runs through the calendar. Here's the whole setup, start to finish, plus how to test it like a real customer before you go live.
First, switch on the resource types you use
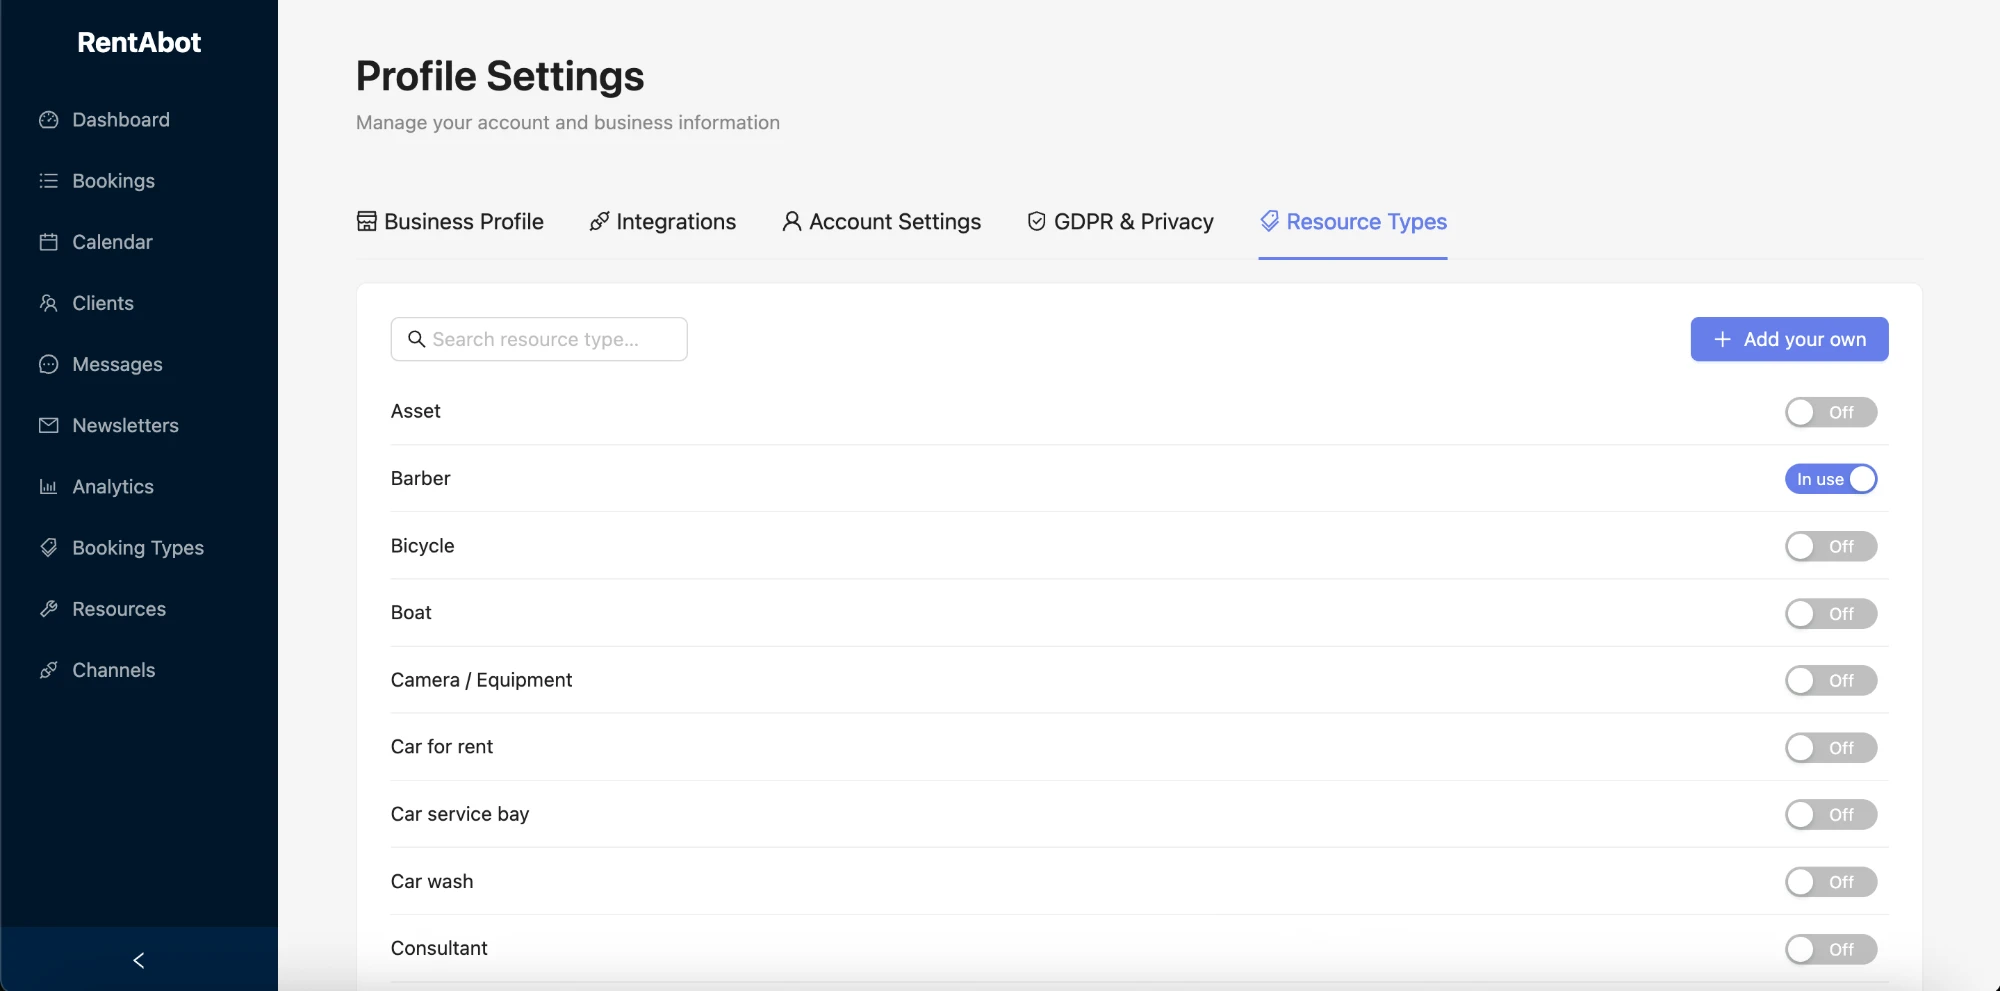
A "resource" is anything a booking ties up — a stylist, a nail master, a massage therapist, a room, a car. RentABot keeps a library of resource types; you just turn on the ones that fit your business. Go to Profile Settings → Resource Types and toggle on what you need (Barber, Massage, and so on), or add your own.
Add your resources
Now open Resources and click Add Resource. Give each one a name like "Natalia — hair stylist", pick its type, and you'll see how many services it's attached to and whether it's active. Each resource has its own schedule — use the calendar icon on its row to set working hours and days off, so the bot only offers times that resource can actually work.
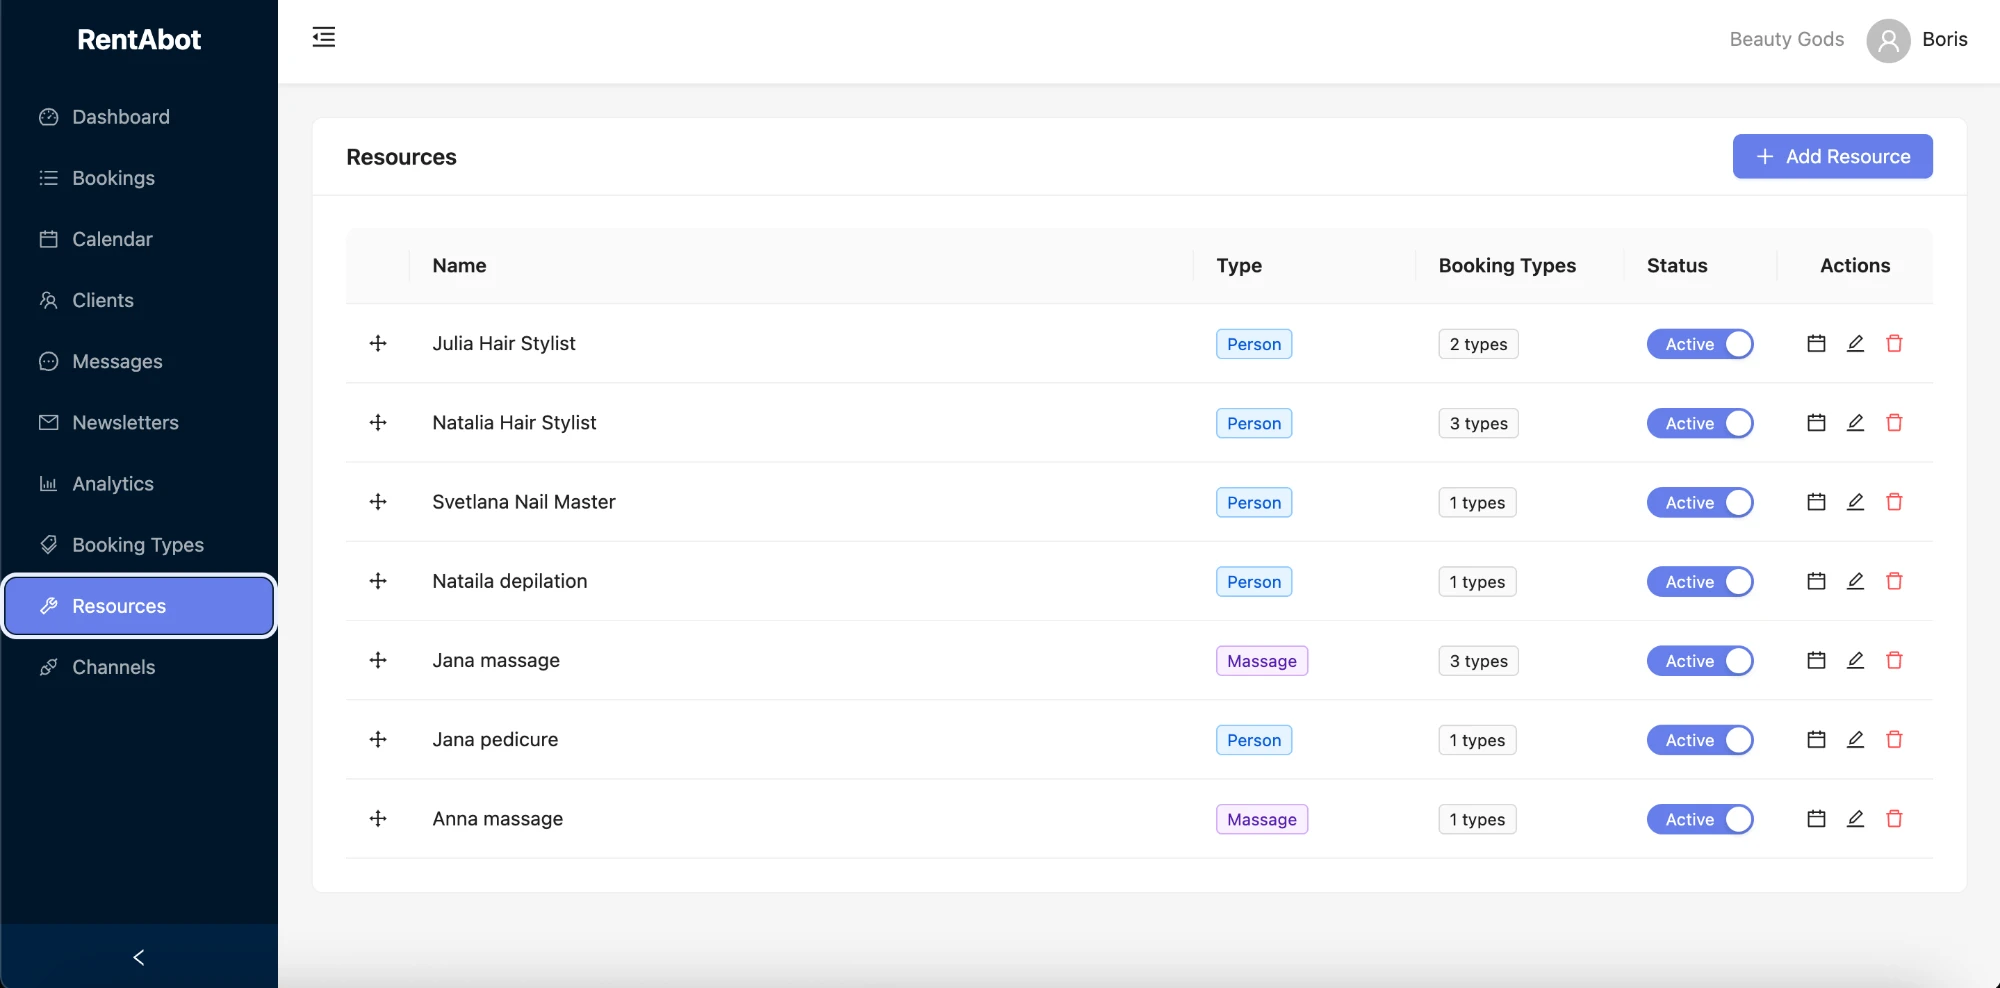
Even if it's just you, add yourself here — the calendar schedules against resources, so without one there's nothing to book.
Create the services you offer
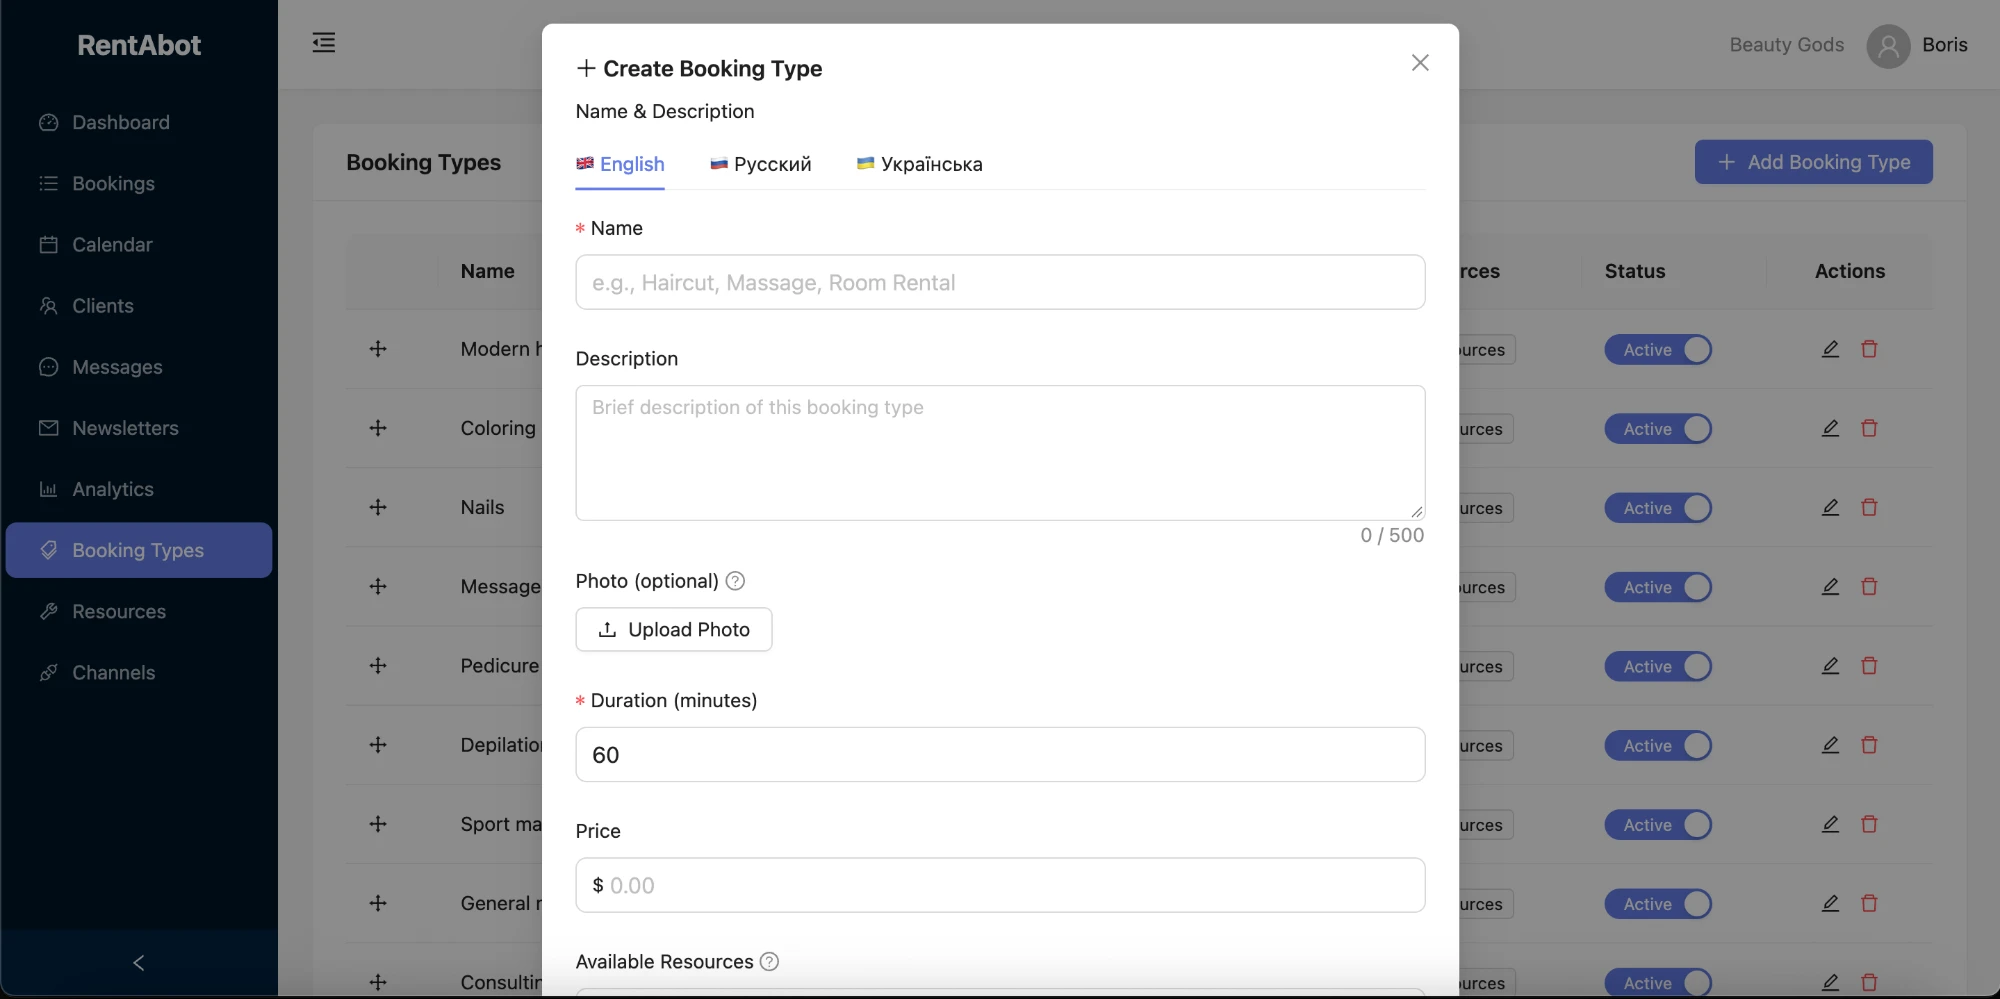
Open Booking Types and click Add Booking Type. In the window that opens, name the service — you can fill it in English, Russian and Ukrainian so clients see it in their own language — set how long it takes and what it costs, add a photo if you like, and tick which resources are allowed to perform it.
Watch the bookings come in
As clients book through your channels, every request lands on the Bookings page. You get the client and their phone, the service and resource, the date and time, which channel it came from, and its status. The filters across the top let you narrow by status, channel, resource or date when the list gets long.
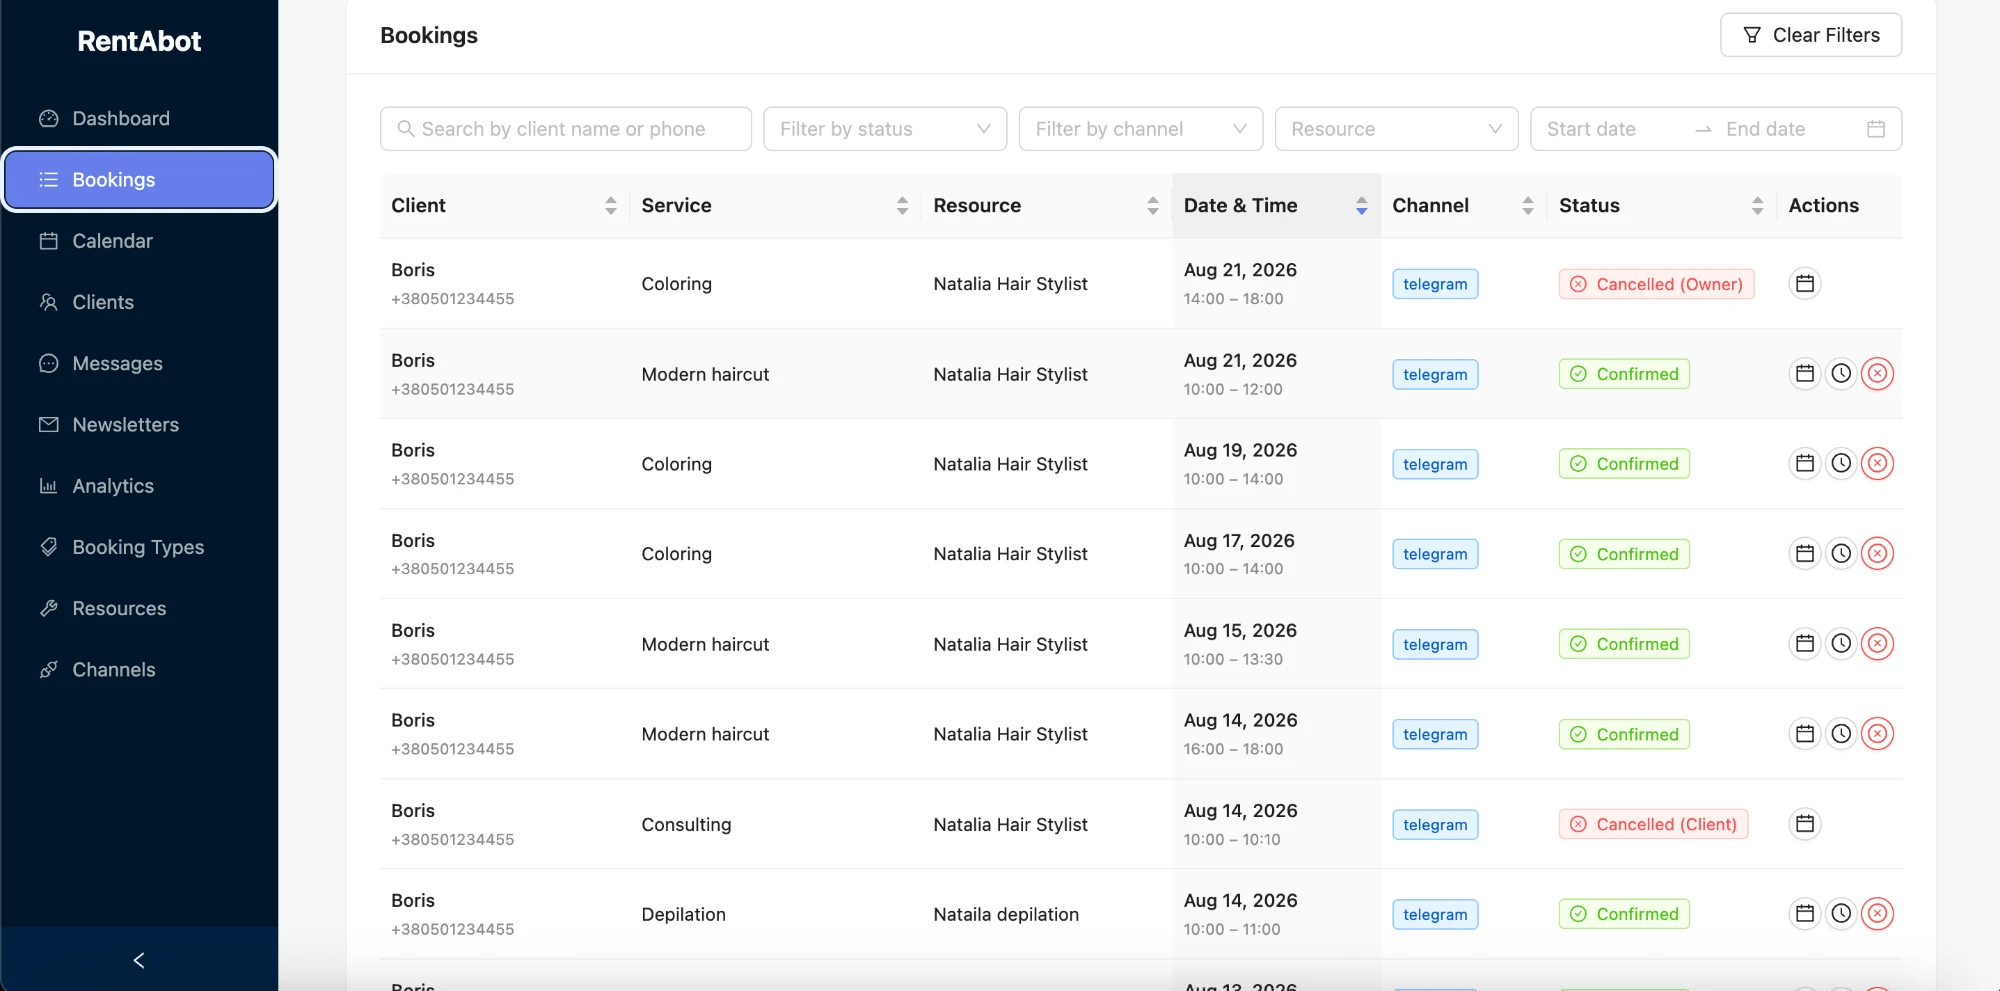
Open a booking to manage it
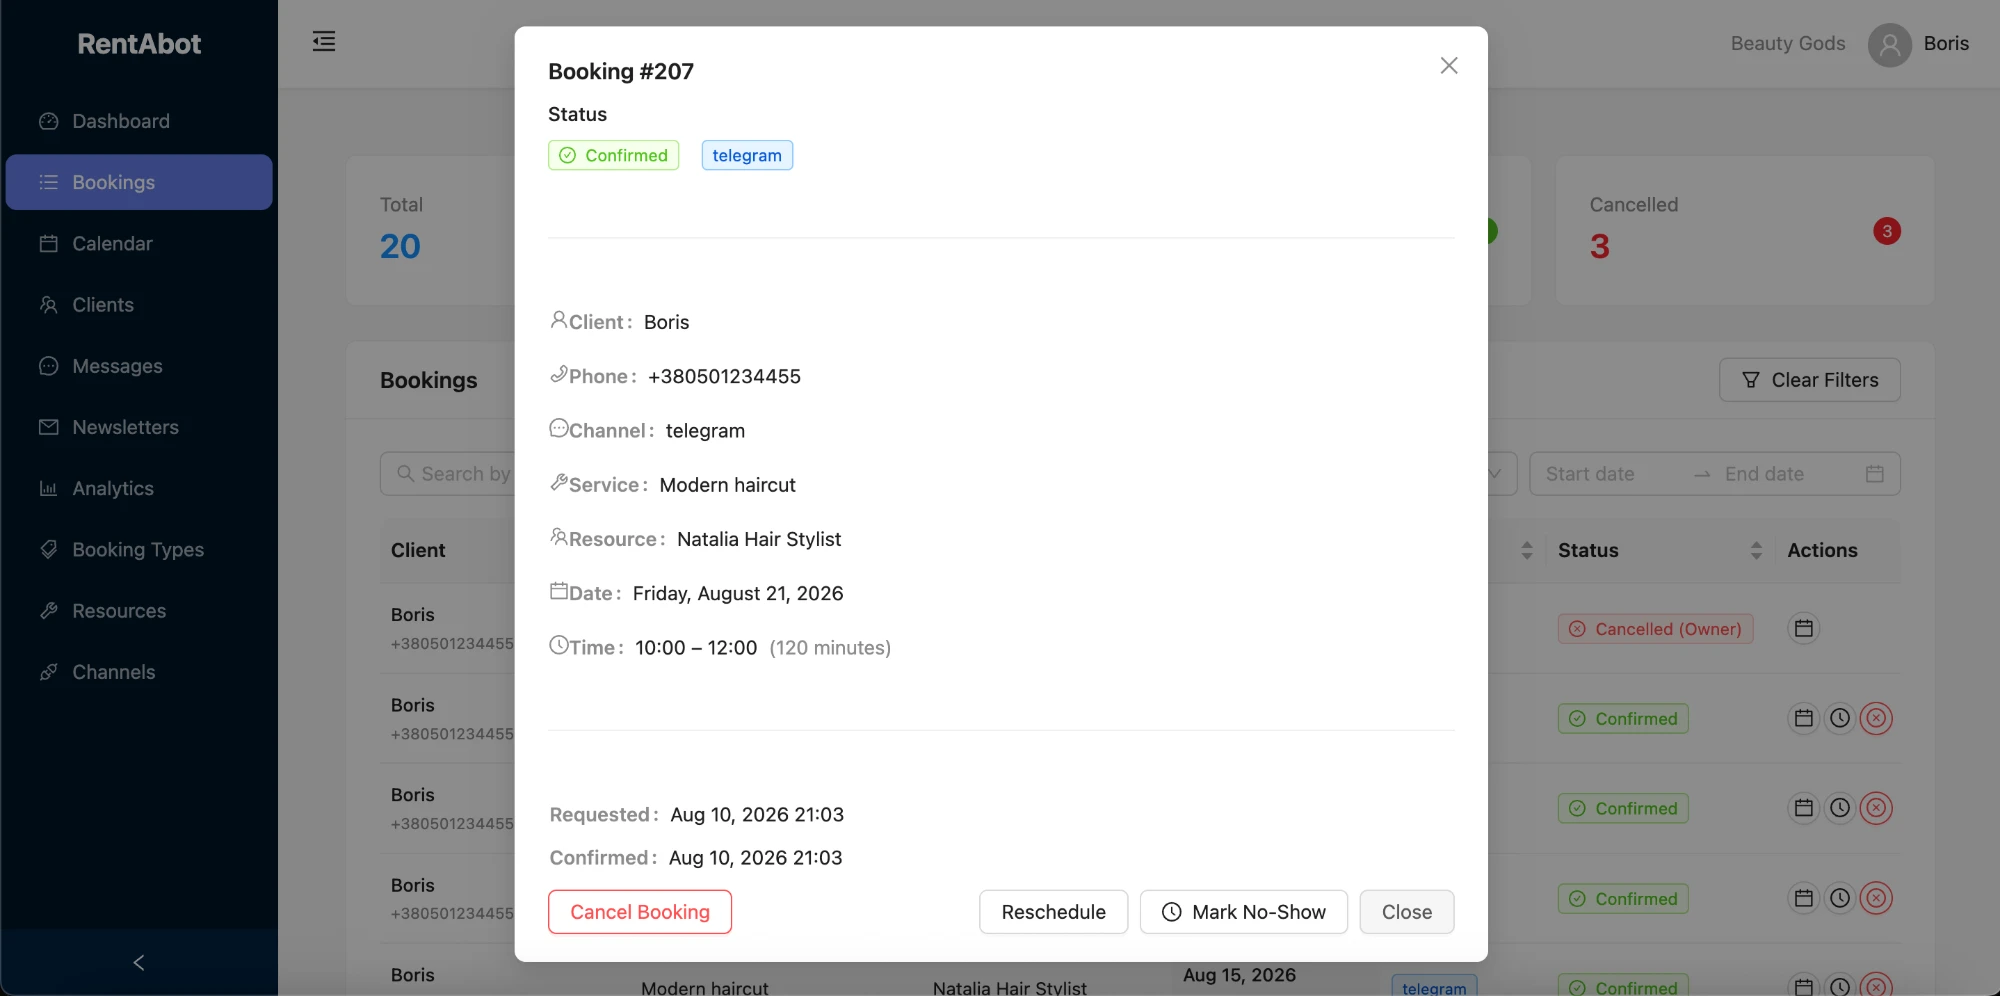
Click any booking to see the full details and act on it. From here you can confirm it, reschedule to a new time (the client is notified automatically), mark a no-show, or cancel. You'll also see exactly when it was requested and confirmed.
See your week at a glance
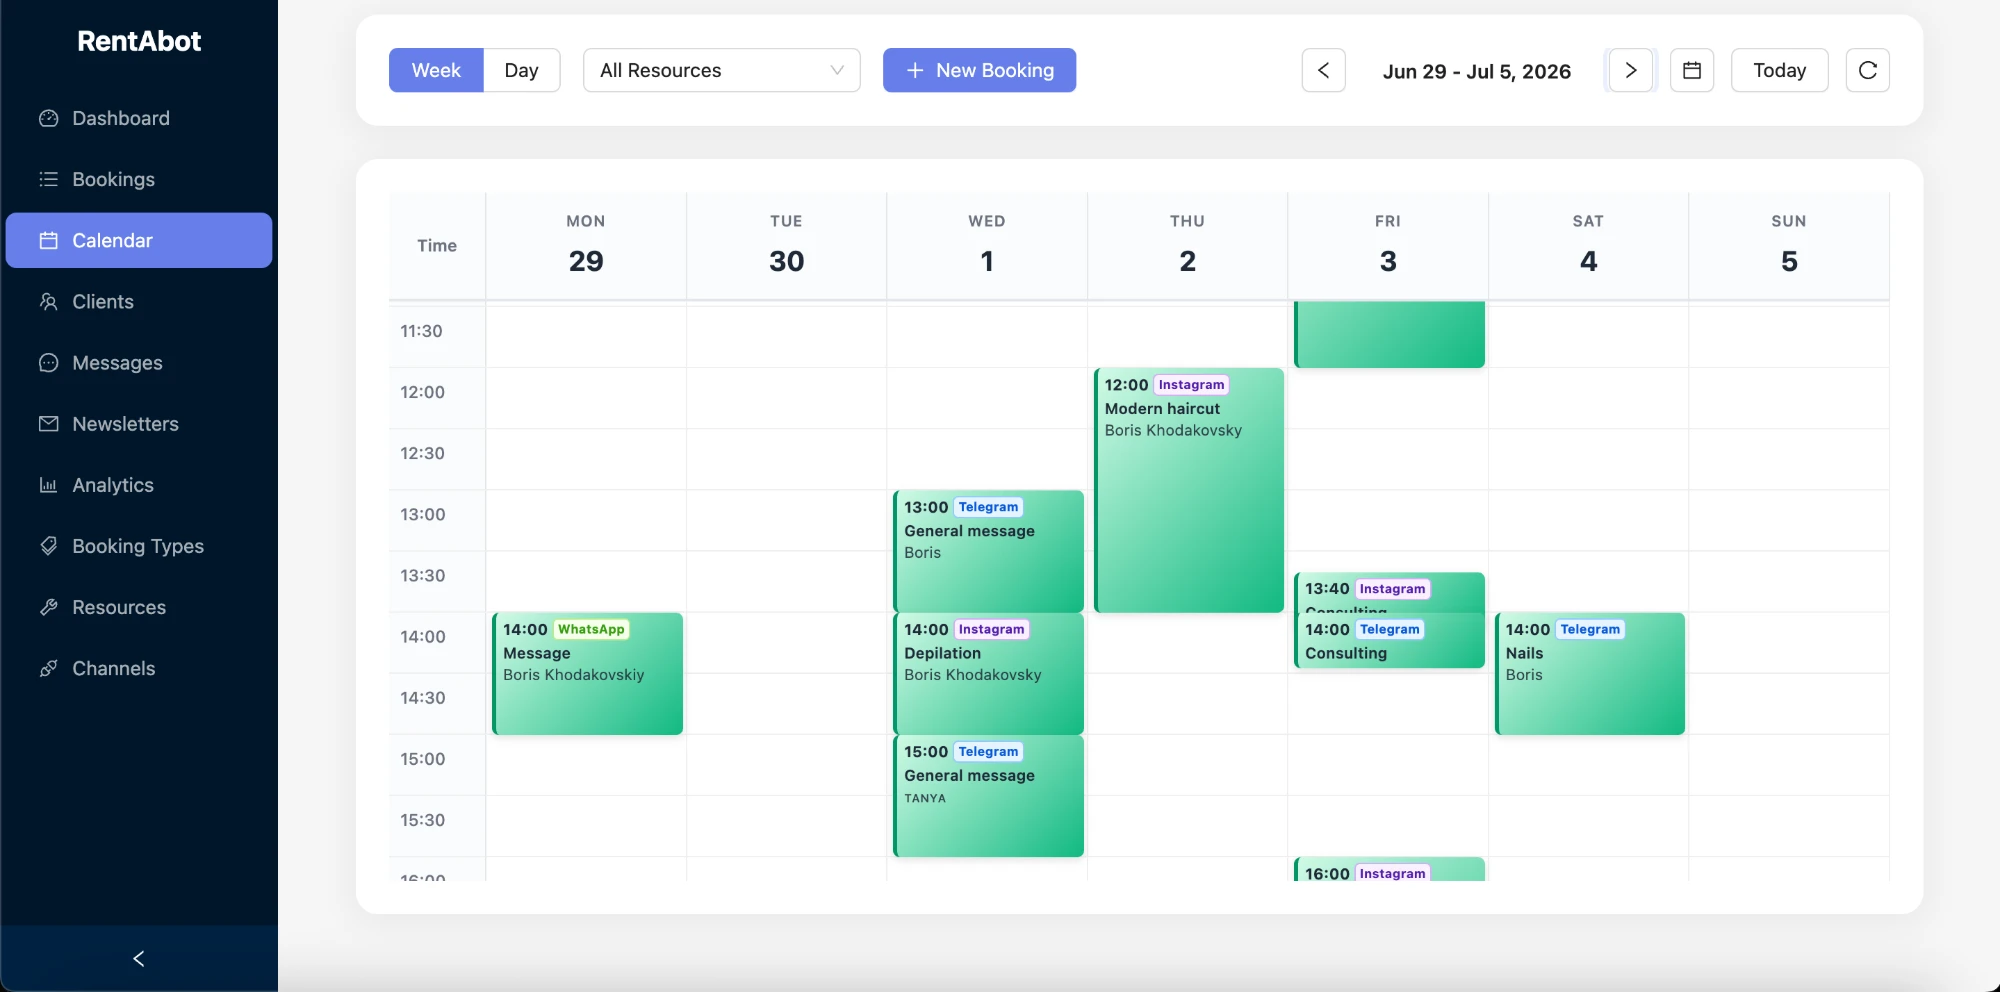
The Calendar lays everything out by day and time, colour-coded and tagged with the channel each booking came from. Switch between week and day, filter to a single resource, or add an appointment yourself with New Booking. Need to move something? Drag it to a new slot.
Keep an eye on your clients
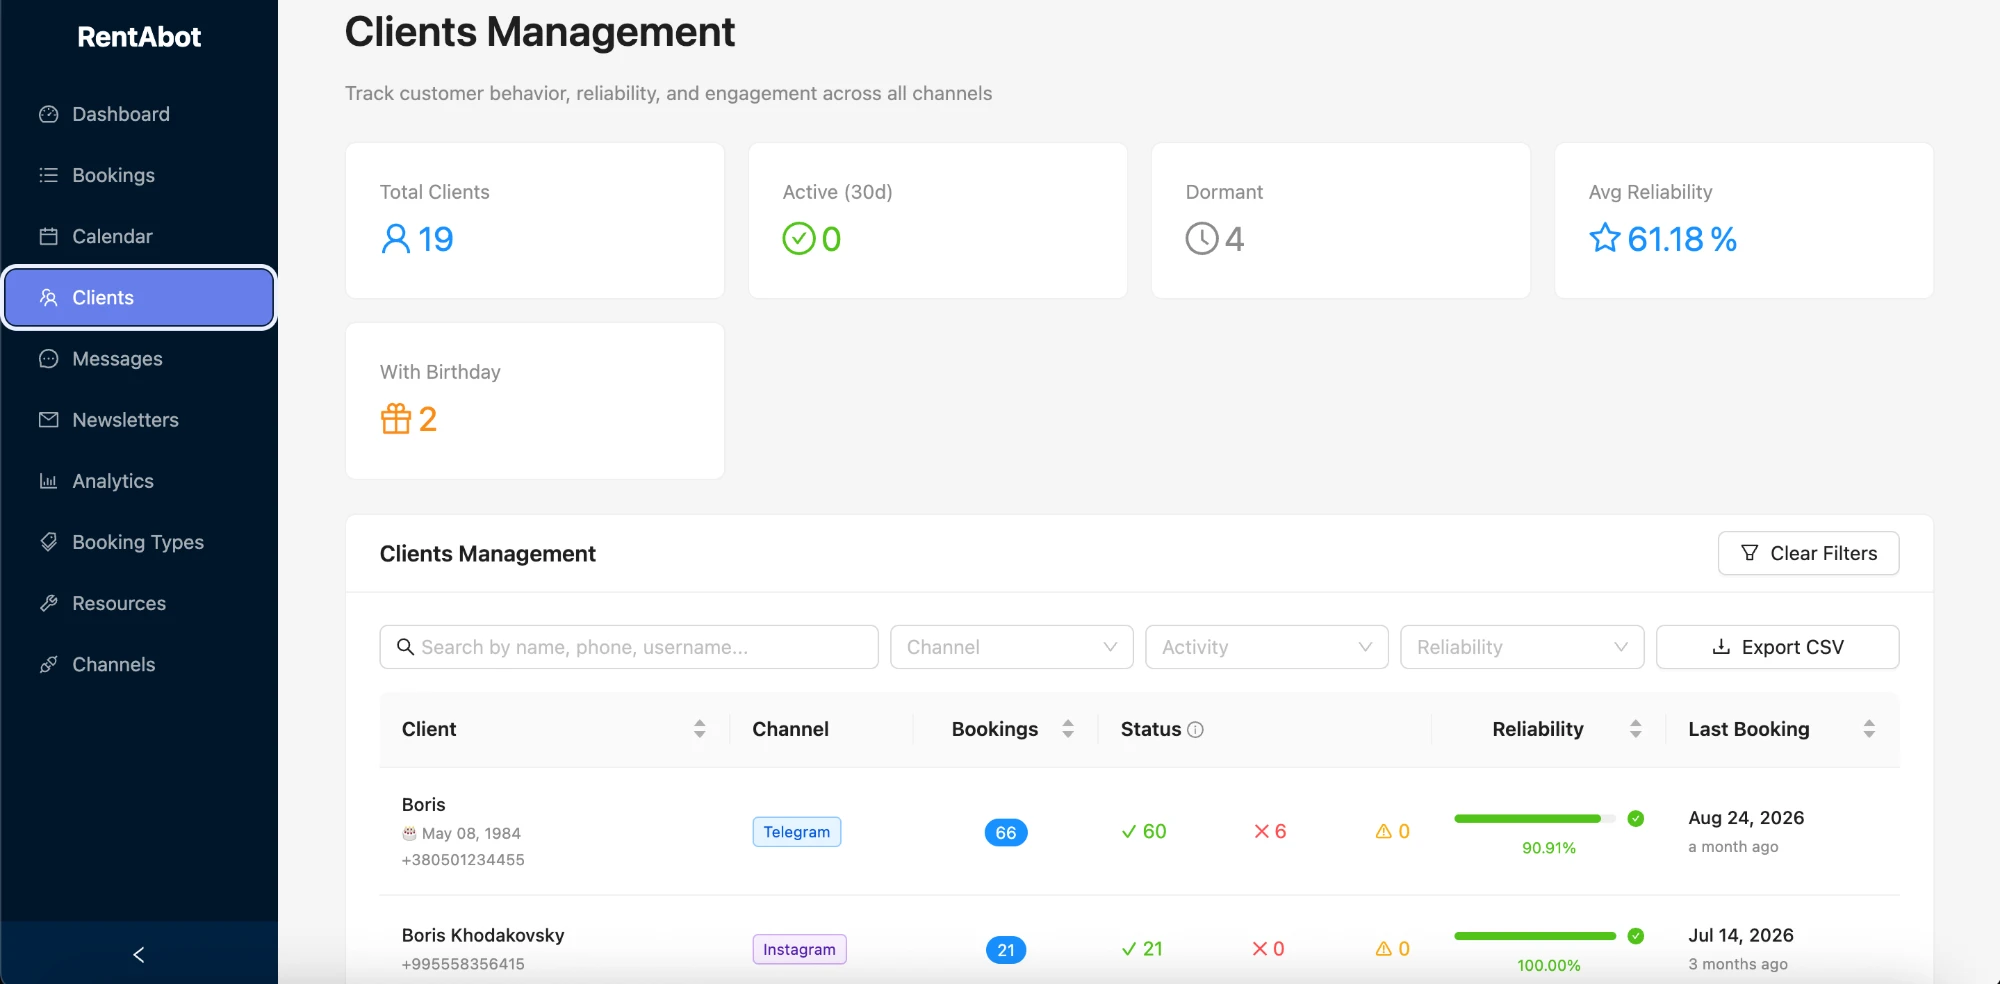
The Clients page builds a profile for everyone who books — how many appointments they've had, how reliable they are, when they last came in, and whose birthday is coming up. It's handy for spotting your regulars and your no-show risks.
Do a real test before you share it
It's worth booking yourself once before sending the link to anyone. Open your bot the way a client would — from a second account, or hand your phone to a colleague — and book a slot. Pick a time outside your working hours so you don't block a real appointment. Then check the whole loop: it shows up on the Bookings page and the calendar, confirming and rescheduling work, and the notifications actually reach the "client". Cancel it when you're done. Five minutes of this now saves you a confused customer later.
Go live
With your resource types switched on, your resources and services in place, schedules set, and one clean test behind you, share your bot link and start taking real bookings. Turn on reminders while you're at it — they're the simplest way to cut no-shows.
If you haven't set up an account yet, you can start a free 14-day trial.